home about projects services contact

Friday, May 20, 2011

Pillow Talk

My favorite way to update a room quickly is with new pillows. Its such a simple way to add color, texture, or pattern, whenever the mood strikes. Usually its the change of seasons that inspires me to add a new pillow (or two)
so I am regularly adding to my collection.

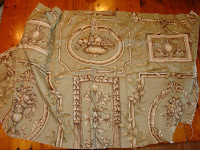
Today I decided to finally use the fabric I bought months ago to make a couple of new pillows for my family room couch. Here I will show you how to make a two sided pillow with decorative cording.

First, gather your supplies...fabric, pillow forms - this is easy...just head to the "pillow closet" and use the inside of an old, retired pillow from last season...no need to buy a new one! What?...you don't have a "pillow closet"?! OK, you can purchase new forms or batting to stuff your pillow. Thanks to my pillow obsession, I have more than enough to keep me supplied for every season or mood that strikes!

I picked a fabric with an overall pattern for one side and a medallion design for the other.

First lay out your old pillow cover to use as your pattern. Just measure the width and add 1 inch to allow a 1/2 inch seam on all sides.


Next, mark your fabric and cut out the square. 


Repeat this step for the coordinating medallion fabric. NOTE: If you are using a fabric with a print, be sure to align your top square over the area you want centered on your pillow. I chose to feature one of the medallions as my focal point for this side.


Now you can pin your cording to the edge of one of your squares.


I like to sew the cording to this piece first...although some may consider this an extra step, I think it makes it easier to sew all three pieces together.

Once you are done sewing the cording on to one side, you can sew the three pieces together. Be sure to place fabric face to face and sew pillow square inside out...leaving an opening on one side to insert your pillow form.


All that's left now is to hand stitch your opening closed...and you are done!


I love the new addition to the family room...although it does look a little lonely sitting there all by itself! No worries...my next post will be a  DIY for a simple flange pillow I made to keep this one company!


Tuesday, May 10, 2011

Fabric Covered Lamp Shades

Having recently installed two hanging pendant style lamp shades over my kitchen table, I have decided that they look great but maybe just a little too plain. I know just the solution for that. I can cover the shades with fabric to customize them and add a bit more style to the space.


First -   Pick some fabric. I chose a graphic greek key style fabric in a gray and off white color. I think this will look great on the shades over my table. To determine how much fabric, depends on the size of your shade. I was able to use 1yard for both tapered drum shades...so approx 1/2 yard each.


Step 2. Gather your supplies and lay out your fabric on a flat surface.
             Supplies; 
lampshades
fabric - 1 yard
fabric glue
scissors
fabric pen
ruler
painters tape


 Lay out your fabric and place shade on top to cut out piece for covering. Since I am using a fabric with an allover print I just centered my shade on the fabric and rolled it from side to side to determine legnth of peice that needed to be cut. NOTE: If you are using a tapered shade as I am (meaning smaller opening on one side) you must remember that your peice of fabric will not be straight, but more curved to follow the shape of the shade.

Next, measure approx 2 inches along top and bottom of shade as you roll it on the fabric...mark with fabric pen.


Cut fabric following you mark. Notice how your final peice is curved to follow the shape of the shade. This is important so you will not have any gapping when you wrap the fabric around the shade.


Wrap the fabric around the shade and glue it on using your fabric glue. I used a small brush to spread the glue so it would get even coverage. Then tape in place. Be sure to glue right at the existing seam on your shade.


Wrape entire length of fabric piece around your shade and secure with a peice of tape. You should have 2 inches of extra fabric along top and bottom of shade. Be sure to pull fabric snug so there are no gaps or wrinkles.


Starting at top of shade, tuck in extra fabric and draw a line along edge of shade with your fabric marker. Continue all around the edge of the shade. Then cut along your line, leaving about 1/2 inch of fabric to turn under for your seam.


Turn under your fabric leaving the turned edge just a fraction above the edge of the shade. Then glue turned edge onto the shade. Tape down as you go. Turn shade over and repeat on other side.


Once the top and bottom edges are turned under and glued it is time to make the finished seam on the second end of fabric. Make sure the second end of fabric extends at lease a couple of inches past the first end that has already been glued into place. Cut the extra fabric off, leaving about 1 inch. Apply a line of glue and turn under. Apply a second line of glue and press down seam then hold with tape.

After glue is set, remove all of your lovely blue tape and hang your brand new fabric covered shade!


Here is the after shot of my new fabric covered shades hanging over my kitchen table. You may have noticed the gray trim around the top of each shade. You can add that last as a finishing detail if desired.


I like the new look. How about you? Have you covered a lamp shade with fabric and or paint?

Create a Hanging Light

Did you know that you can change a ceiling can light into a hanging pendant light? Yes...you can?!


And best of all it is super easy with the pendant light adapter kits available. You can find these kits online in catalogs such as Ballard Designs - here -  and even at your local home improvement stores like Lowe's - here -  and Home Depot - here.

It really is as easy as changing a light bulb. First you unscrew your existing bulb then screw in the adapter. Next slide up the ceiling plate and you are done!
Well, almost done...now you need to find a light fixture to hang.


I decided to use two drum style shades over my kitchen table. I have always wondered why the previous owners took out the fixture there...guess it was the style in those days...you know, "swiss cheese" ceilings, with all the can lights!

Not any more...


Now that is MUCH better! Except for one thing...the plain white shades do lack a little style. I know just how to fix that. How about covering the shades with some fabric!

Check back for my next post "Fabric Covered Lamp Shades" to find out how.
 
01 09 10